Building a Procedural Maze Generator in UE5 Blueprints — Part 1
Introduction
Welcome to Part 1 of this beginner-friendly series.
In this part, we are not building the maze yet.
Instead, we are building the foundation that everything else depends on.
What You Will Build in This Part
By the end of Part 1, you will have:
- a clean project structure
- two reusable data structures (
S_NeighborInfo,S_MazeCell) - a fully set up
BP_MazeGeneratorBlueprint - all required variables configured
- instanced mesh components ready for rendering later
This is the groundwork. If this part is wrong, everything later becomes confusing.
Before You Start
Make sure you have:
- Unreal Engine 5.3 or newer
- a new Blank or Third Person project
Step 1 — Project Setup and Asset Preparation
What this step does
This step prepares your project so everything stays organized and easy to follow.
Good organization now prevents confusion later.
Instructions
Step 1.1 — Create a new project
Step 1.1.1 — Open the project browser
-
Open Unreal Engine 5
-
Click:
Games
Step 1.1.2 — Choose the project template
-
Select:
Blank
-
Click:
Next
Depending on your Unreal version, the exact button layout may look slightly different.
Step 1.1.3 — Set the project options
- Choose:
- Blueprint
- Desktop/Console
- Maximum Quality
-
Give your project a name
-
Click:
Create
Step 1.2 — Create your folder structure
Step 1.2.1 — Create the main folder
-
Open the Content Browser
-
Right-click in empty space
-
Click:
New Folder
-
Name it:
MazeGenerator
Step 1.2.2 — Create the subfolders
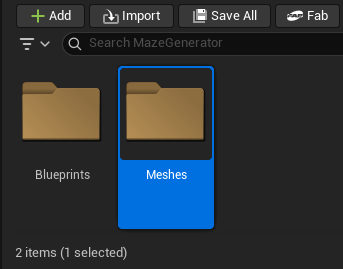
-
Double-click to open the folder
-
Create two more folders:
BlueprintsMeshes
Step 1.3 — Prepare placeholder meshes
For this tutorial, you need two mesh references later:
- one for the floor
- one for the walls
For beginners, the easiest option is to use Unreal’s built-in meshes instead of making your own custom assets.
Step 1.3.1 — Option A: Use Unreal’s built-in meshes (recommended)
Unreal Engine already includes basic shapes you can use immediately.
We will use these instead of creating custom meshes.
Step 1.3.1.1 — Show Engine Content
By default, Unreal hides built-in assets.
-
Open the Content Browser
-
In the bottom-right corner, click the Settings button (gear icon)
-
Enable:
✔️ Show Engine Content
Step 1.3.1.2 — Locate the built-in meshes
-
In the Content Browser, scroll down until you see a folder called:
Engine -
Expand:
Engine → Content → BasicShapes -
Inside this folder, find:
CubePlane(optional)
These are built-in meshes provided by Unreal Engine.
Step 1.3.1.3 — Choose meshes for this tutorial
For simplicity, use:
Cube→ for wallsCube→ for floor (temporary)
We will scale them later, so using the same mesh is perfectly fine.
Step 1.3.1.4 — Create references in your folder (optional but recommended)
To keep your project organized, you can create copies:
-
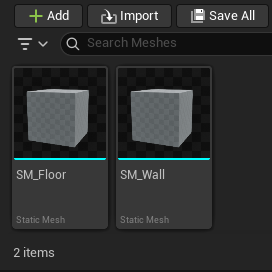
Left-click on
Cube. -
Drag it twice to:
MazeGenerator/Meshes -
Rename:
SM_FloorSM_Wall
If you skip this step, you can still use the Engine meshes directly.
This step just keeps your project cleaner.
Step 1.3.1.5 — Verify the mesh
-
Double-click
SM_FloororCube -
The Static Mesh Editor will open
-
You should see:
- a simple 3D cube
- dimensions (usually 100×100×100)
Step 1.3.2 — Option B: Import your own meshes
If you already have custom meshes:
Step 1.3.2.1 — Open the Meshes folder
-
Open the Content Browser
-
Open your:
MazeGenerator/Meshesfolder
Step 1.3.2.2 — Import the files
-
Click:
Import
-
Select your mesh files from your computer
-
Import:
- a floor mesh
- a wall mesh
Connections recap
Project structure created:
MazeGeneratorMazeGenerator/BlueprintsMazeGenerator/Meshes
Mesh preparation options:
- built-in Engine meshes
- imported custom meshes
Why this matters
- gives you working meshes immediately
- avoids needing external 3D software
- keeps the focus on learning Blueprints
Common mistakes
❌ Not enabling Show Engine Content
✔️ You won’t see the BasicShapes folder without it
❌ Looking in your project folders only
✔️ Built-in meshes are inside the Engine folder
❌ Thinking you need custom assets first
✔️ You don’t—these are perfect for learning
❌ Creating assets in random folders
✔️ Keep everything inside MazeGenerator
Expected result
You now have:
MazeGenerator/BlueprintsMazeGenerator/Meshes- access to placeholder meshes for floor and wall use
These will be assigned later in your Blueprint.
Step 2 — Create the Data Structures
What this step does
This step creates custom data containers (structs).
These will store:
- maze cell data
- neighbor relationships
Without these, your maze logic cannot function.
Instructions
Step 2.1 — Create S_NeighborInfo
Step 2.1.1 — Add the structure asset
-
Go to:
MazeGenerator → Blueprints -
Right-click in empty space
-
Search for:
Structure -
Click Structure in the results menu
-
A new asset will appear, rename it to:
S_NeighborInfo
Step 2.1.2 — Add the variables
-
Double-click to open the struct
-
Add:
CellIndex(Integer)DeltaX(Integer)DeltaY(Integer)- Default value is 0. You do not need to change this
Why this matters
This struct tells your system:
- which cell is a neighbor
- in what direction it exists
Common mistakes
❌ Using wrong variable types
✔️ All must be Integer
Expected result
You now have a struct that describes neighbor relationships.

Step 2.2 — Create S_MazeCell
Step 2.2.1 — Add the structure asset
-
Right-click in
Blueprints -
Search for:
Structure -
Create the structure
-
Name it:
S_MazeCell
Step 2.2.2 — Add the variables
-
Double-click to open the struct
-
Click on Add Variable and add:
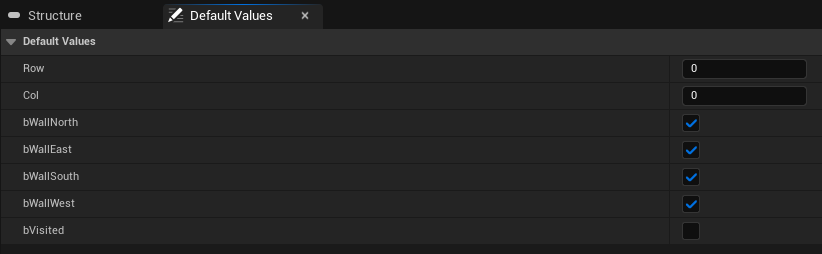
Row(Integer)Col(Integer)bVisited(Boolean, default = False)bWallNorth(Boolean, default = True)bWallEast(Boolean, default = True)bWallSouth(Boolean, default = True)bWallWest(Boolean, default = True)
- Click on Default Values and add the values above
- Default values for integers can remain 0. A checked box in a boolean is always true
Why this matters
Each cell:
- tracks its position
- remembers if it was visited
- stores all four walls
This is the core data for the maze.
Common mistakes
❌ Forgetting default values
✔️ Walls must start as True
Expected result
You now have a full maze cell data structure.
Step 3 — Create the Maze Generator Blueprint
What this step does
This creates the main Blueprint that controls everything.
Instructions
Step 3.1 — Create the Blueprint
Step 3.1.1 — Add the Blueprint Class
-
Right-click inside:
Blueprints -
Click:
Blueprint Class
-
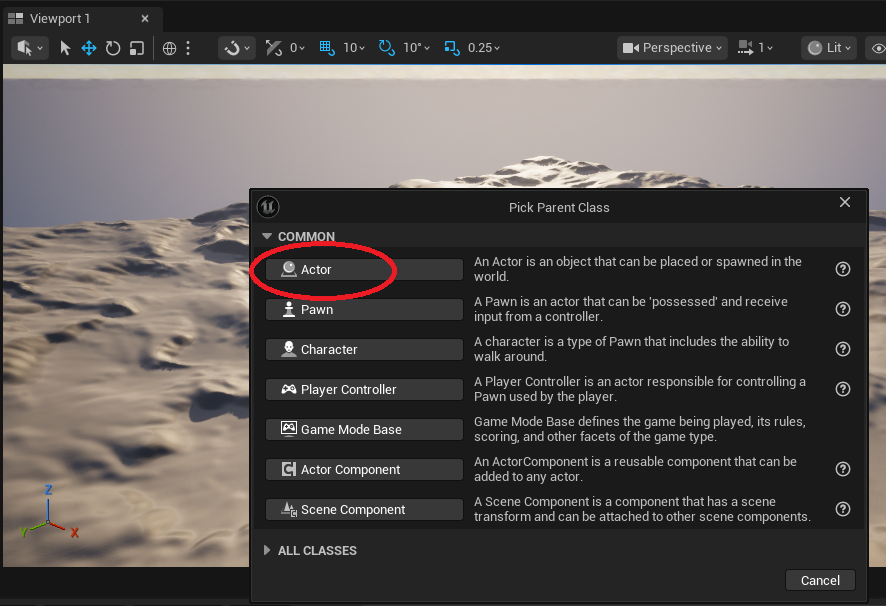
Select:
Actor - this is the base class for objects that can exist in the world but don’t need movement or player input built in.
-
Name it:
BP_MazeGenerator
Step 3.1.2 — Open the Blueprint
- Double-click to open it. After creating and opening a Blueprint, don’t forget to save (Ctrl+S). UE5 won’t always auto-save new assets
Why this matters
This Blueprint will:
- generate the maze
- store all data
- eventually render the maze
Common mistakes
❌ Choosing the wrong class type
✔️ Use Actor
Expected result
You now have an empty BP_MazeGenerator.
Step 4 — Add Variables and Components
What this step does
This step defines all settings and components your maze will use.
Instructions
Step 4.1 — Create Variables
Step 4.1.1 — Open the Variables section
Inside BP_MazeGenerator:
-
Go to:
My Blueprint → Variables
-
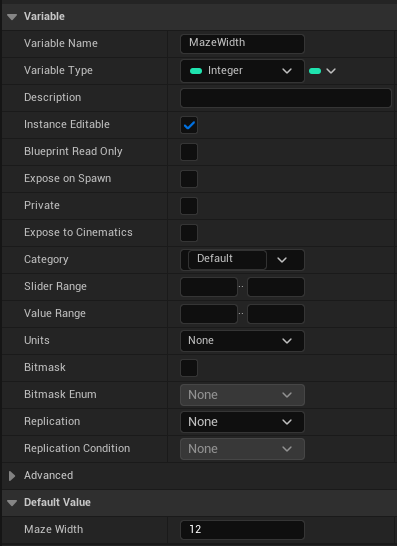
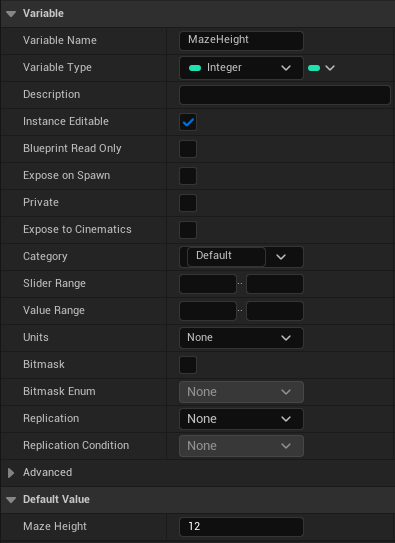
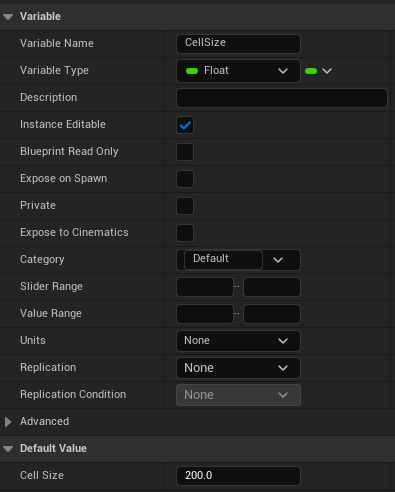
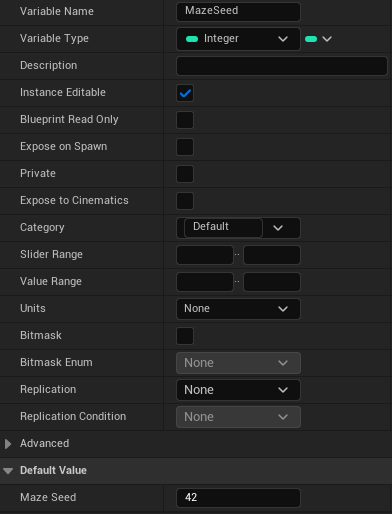
Click the + button next to Variables in the My Blueprint panel. A new variable will appear. Rename it, then set its type in the Details panel on the right.
Step 4.1.2 — Add the maze settings
- Note: In the upper left corner, you must click on compile after adding variables to be able to enter the default values in the Details panel.
Add the following:
MazeWidth(Integer, Default = 12)MazeHeight(Integer, Default = 12)CellSize(Float, Default = 200.0)MazeSeed(Integer, Default = 42)
Step 4.1.3 — Add the data variables
Add:
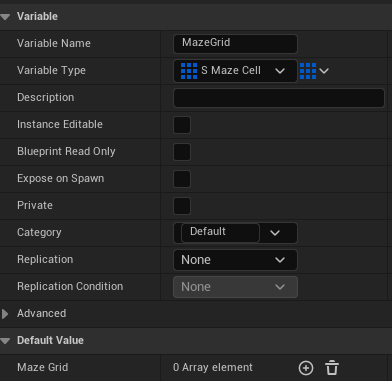
MazeGrid(Array ofS_MazeCell)
-
Set the type to S_MazeCell
-
In the Details panel, click the grid/array icon next to the type dropdown to change it from a single value to an Array
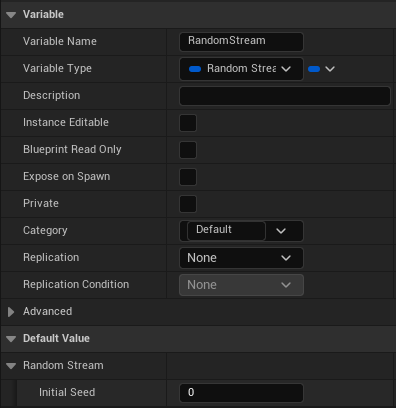
RandomStream(Random Stream)
Step 4.1.4 — Make the main settings editable
For each variable you want to adjust in the level:
- Select the variable
-
In the Details panel:
✔️ Check Instance Editable (You can also click the eye next to the right of the variable name. Open is editable, closed is not)
For this tutorial, that usually means:
MazeWidthMazeHeightCellSizeMazeSeed
You do not need to make MazeGrid or RandomStream editable.
Why this matters
- lets you tweak maze size and seed in the editor
- keeps your system flexible
Common mistakes
❌ Forgetting Instance Editable
✔️ You won’t be able to change values in the level
❌ Making every variable editable
✔️ Only expose the ones you actually want to change
Expected result
Your main maze settings are now created and visible.
Step 4.2 — Add HISM Components
Step 4.2.1 — Add the FloorHISM component
- HISM (Hierarchical Instanced Static Mesh) lets you render thousands of repeated meshes efficiently. You’ll use one for floors and one for walls.
-
Open the Components panel inside
BP_MazeGenerator -
Click:
Add
-
Search for:
Hierarchical Instanced Static Mesh -
Click it
-
Rename the new component:
FloorHISM
Step 4.2.2 — Add the WallHISM component
-
Repeat the process to add a second component
-
Rename it:
WallHISM
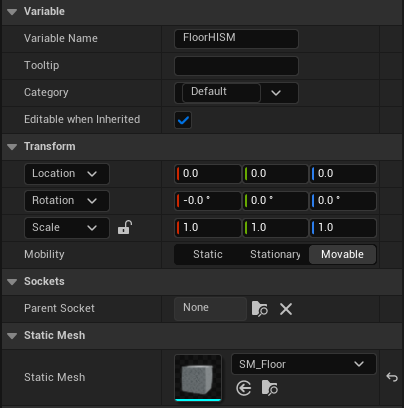
Step 4.2.3 — Assign the floor mesh
Select:
FloorHISM in the components panel at the top left
Then in the Details panel:
- find Static Mesh in the Detaols panel. You may have to expand the category
- assign
SM_Floorif you duplicated the mesh - or assign
Cubeif you are using the built-in mesh directly
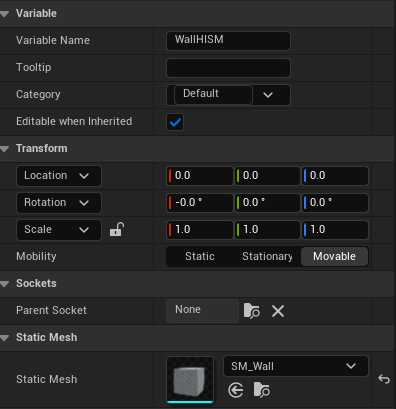
Step 4.2.4 — Assign the wall mesh
Select:
WallHISM in the components panel at the top left
Then:
- assign
SM_Wallif you duplicated the mesh - or assign
Cubeif you are using the built-in mesh directly
Connections recap
Components added:
FloorHISMWallHISM
Mesh assignments:
- floor mesh →
FloorHISM - wall mesh →
WallHISM
Why this matters
HISM allows:
- many repeated meshes
- much better performance than spawning separate mesh actors
This is a much better choice for grid-based systems like mazes.
Common mistakes
❌ Using regular Static Mesh Components
✔️ Use Hierarchical Instanced Static Mesh
❌ Forgetting to assign a mesh
✔️ Nothing will appear later if the mesh is empty
❌ Naming components unclearly
✔️ Use FloorHISM and WallHISM so the Blueprint stays readable
Expected result
You now have:
FloorHISMWallHISM
Both are added as components and both have a mesh assigned.
What You Have Built So Far
At this point, your system now has:
- organized project structure
- two working data structures
- a maze generator Blueprint
- all required variables
- rendering components ready
You now have the full foundation in place.
Up Next
In Part 2, we will:
- initialize the maze grid
- implement the recursive backtracker algorithm
- create helper functions
- generate a complete maze in memory
👉 This is where the maze logic begins.